How to Fix Broken Pottery
By Linda · · 9 min read
To fix broken pottery, gather and clean all the broken pieces, then apply a two-part epoxy to the broken edges and press the pieces firmly together in their original positions. Secure the joins with painter’s tape or clamps until the adhesive cures, usually 24 hours for full strength. Once cured, sand away excess adhesive, fill any gaps or missing chips with epoxy putty, and touch up the repair with paint or cold glaze to match.
That’s the short version. The right approach depends on what you’re fixing: a clean break, a hairline crack, a shattered piece, or unfired clay each call for a different method. I’ll walk through all of them below.
What You’ll Need
Before starting the repair, collect every fragment. Even tiny slivers matter for a tight fit. Then gather:
- Two-part clear epoxy (a 30-minute set gives you working time; 5-minute epoxy is less forgiving)
- Epoxy putty or epoxy clay for filling gaps and rebuilding missing chips
- Painter’s tape, rubber bands, or small clamps
- Fine-grit sandpaper (320–600 grit) and a sanding block
- Acetone or rubbing alcohol for cleaning edges and wiping squeeze-out
- Toothpicks or a small brush for precise adhesive application
- Disposable gloves
- A box of sand or rice to hold the piece steady while glue cures (an old potter’s trick)
Total cost for supplies runs about $15–$30 if you’re starting from scratch, and most of it will last through many repairs.
Choosing the Right Adhesive
The adhesive makes or breaks the repair — literally. For most ceramic repairs, two-part epoxy is the answer, but here’s how the common options compare:
| Adhesive | Bond strength | Water resistance | Best for |
|---|---|---|---|
| Two-part epoxy | Excellent | Excellent | Most pottery repairs; load-bearing joins |
| PVA ceramic adhesive | Good | Moderate | Decorative pieces, porous earthenware |
| Super glue (cyanoacrylate) | Good initially, brittle over time | Poor | Quick fixes on small decorative items |
| Gorilla Glue (polyurethane) | Strong but foams | Good | Not recommended; expands and pushes joins apart |
Super glue is tempting because it’s fast, but it gets brittle with age and fails with moisture or temperature swings. Polyurethane glues foam as they cure, which forces hairline gaps open. I’ve covered the foaming problem in detail in Can You Use Gorilla Glue on Pottery?. Short answer: skip it for ceramics.
For a deeper comparison of specific adhesive types and when each one earns its place, see my guide to the best glue for fixing pottery.
Step-by-Step: Repairing a Clean Break
1 – Clean the broken pieces
Wash the fragments with mild soapy water to remove dirt, dust, and any old adhesive, then let them dry completely. Moisture trapped in the join weakens epoxy. Wipe the broken edges with acetone or rubbing alcohol just before gluing to remove skin oils.
2 – Dry-fit everything first
Assemble the piece without glue to learn the order the fragments go back together. With multi-piece breaks, gluing in the wrong order can lock you out of fitting the last fragment. Number the pieces with painter’s tape if it helps.
3 – Apply epoxy to the edges
Wearing gloves, mix your epoxy and apply a thin, even layer to one broken edge using a toothpick. Less is more here. A thick glue line keeps the pieces from seating fully and leaves a visible ridge.
4 – Press and hold
Align the pieces and press them firmly together until you feel them “click” into their original position. Hold for a minute or two, then wedge the piece into a box of sand or rice so gravity holds the join closed while it sets.
5 – Tape or clamp the join
Run painter’s tape across the join in several directions, or use rubber bands or clamps for larger pieces. Leave it undisturbed for the full cure time, typically 24 hours for two-part epoxy, even if the package says it sets in 30 minutes.
6 – Remove squeeze-out and sand
Wipe wet squeeze-out immediately with an alcohol-dampened swab. Once cured, sand any remaining ridge with 320-grit paper, working up to 600 grit for a smooth finish. Sand only the glue line. You’ll scratch the surrounding glaze if you wander.
7 – Fill gaps and missing chips
Mix epoxy putty and press it into any gaps or missing sections, shaping it to match the surrounding contour. Let it harden fully (usually 1–24 hours depending on the product), then sand smooth.
8 – Touch up with paint or cold glaze
Use acrylic paint or a cold-glaze product to color-match the repair, then seal with a clear coat if the piece is decorative. Real glaze isn’t an option here. Refiring a glued piece would burn off the epoxy and likely crack the pot.
I’ve written a more detailed walkthrough of the gluing stage in How to Glue Pottery Back Together, including how to handle multi-fragment breaks.
How to Fix Cracked Ceramic Pottery (Not Fully Broken)
A crack is a different repair than a break, because you can’t get adhesive deep into a closed seam.
For a hairline crack, work thin cyanoacrylate or a low-viscosity epoxy into the crack with a toothpick, flexing the piece very gently to open the seam slightly so the adhesive wicks in. Capillary action does most of the work. Tape the piece snugly and let it cure 24 hours.
For a wider, open crack, treat it like a break: clean it, fill it with epoxy mixed with a little filler powder (or use epoxy putty for deep gaps), tape it closed, and sand smooth after curing. I cover the full technique in How to Fix Cracks in Fired Pottery.
One caution: a structural crack in a piece that holds liquid will usually keep creeping even after repair. Repaired cracked vases are best used with a liner or for dried arrangements.
If what you’re seeing is a fine web of lines in the glaze surface rather than a true crack, that’s crazing, a glaze fit issue rather than a structural one. It’s handled completely differently; see How to Fix Crazing in Pottery.
Fixing Broken Clay Pottery That Hasn’t Been Fired
If your own clay work broke before firing, the rules change entirely. The news is mixed.
Bone-dry greenware that breaks can sometimes be rejoined with a thick slip made from the same clay body, often with a splash of vinegar or commercial mending solution to help it grip. Score both edges, apply the slip generously, press together, and dry slowly under plastic. Honestly, success rates are low. Bone-dry joins often re-crack in the bisque firing because the moisture you’ve reintroduced shrinks unevenly.
Leather-hard breaks repair much more reliably: score, slip, and compress the join just as you would when attaching a handle.
Bisqueware that breaks can’t be mended with slip. The bisque firing changes the clay permanently, so fresh clay or slip won’t bond to it. Your options are epoxy (which means the piece can never be glaze-fired) or starting over. Most potters I know reclaim the loss and remake the piece; it’s usually faster than fighting a repair. If breakage is a recurring problem in your work, Why Does My Pottery Crack? covers the drying and firing causes worth fixing at the source.
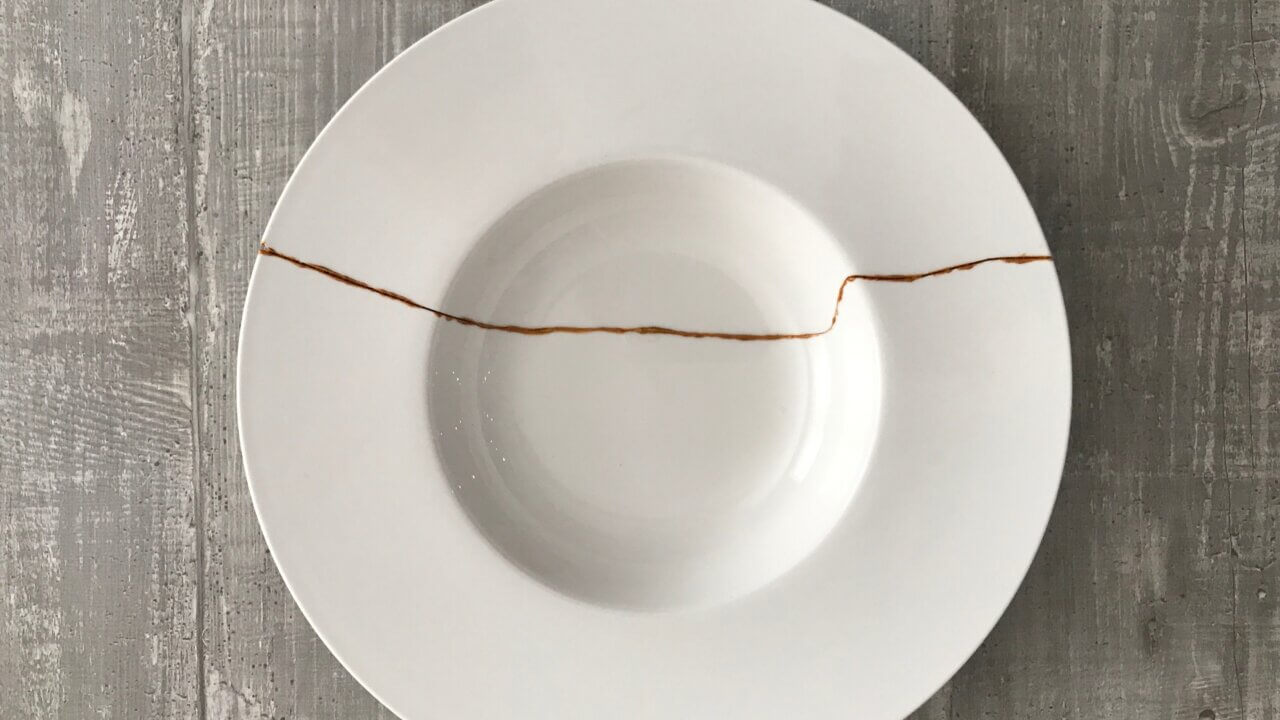
Kintsugi: Making the Break Part of the Design
Kintsugi is the Japanese art of repairing pottery with lacquer dusted with gold, treating the break as part of the object’s history rather than something to hide.
Traditional kintsugi uses urushi lacquer and takes weeks of curing between stages. Modern kintsugi kits substitute epoxy mixed with brass or gold mica powder and follow the same steps as a standard epoxy repair. You just apply the adhesive slightly proud of the surface and dust the wet glue line with metallic powder instead of sanding it invisible. Kits run roughly $20–$60.
It’s a forgiving technique for a first repair because perfectly hidden seams aren’t the goal. For pieces too far gone even for kintsugi, I’ve collected ideas in What to Do With Broken Pottery: mosaic, garden drainage, and more.
When to Call a Professional Restorer
DIY repair is right for sentimental, everyday, and decorative pieces. Go professional when:
- The piece is an antique or has real market value (amateur epoxy repairs can cut a collectible’s value far more than a documented professional restoration)
- The break involves dozens of fragments or powdered loss along the edges
- The pottery has historical, museum, or appraisal significance
Professional ceramic restoration typically starts around $100–$200 for a simple break and climbs into the high hundreds for invisible museum-grade restoration with reconstructed missing areas. If you suspect a piece is old enough to matter, check How to Tell if Pottery Is Antique before you open the epoxy.
Caring for Repaired Pottery
A good epoxy repair is strong, but it’s never as strong as the original fired ceramic. Treat repaired pieces gently:
- Hand-wash only; dishwasher heat and detergent degrade epoxy over time
- Keep repairs away from ovens, stovetops, and direct sunlight; most epoxies soften above roughly 150°F (65°C)
- Avoid temperature shock, like pouring boiling water into a repaired mug
- Display repaired pieces away from high-traffic spots and table edges
Routine cleaning is fine, just be gentle along the glue lines. My pottery cleaning guide covers safe methods for both repaired and fragile pieces.
FAQ Section – Fixing Broken Pottery
What is the best glue to fix broken pottery?
Two-part clear epoxy is the best all-around choice. It bonds ceramic strongly, resists water, dries clear, and fills tiny gaps that super glue can’t. A 30-minute formula gives you time to align pieces properly before it sets.
Can I use super glue to fix broken ceramic?
You can on small decorative items, but epoxy lasts longer. Super glue becomes brittle with age and fails when exposed to moisture or temperature changes, so it’s a poor choice for anything handled or washed regularly.
How do you fix cracked ceramic pottery without taking it apart?
Wick thin, low-viscosity adhesive into the crack with a toothpick, gently flexing the piece so the seam opens a hair and capillary action pulls the glue deep. Tape it closed and cure for 24 hours, then sand the surface flush.
Can broken clay pottery be fixed before firing?
Sometimes. Leather-hard breaks rejoin well with scoring and slip. Bone-dry (greenware) breaks can be attempted with thick slip or a vinegar-based mender, but they often fail in the firing. Broken bisqueware can only be glued, not refired with glaze.
Is repaired pottery safe for food and drinks?
No. Standard epoxies aren’t food-safe, the glue lines can harbor bacteria, and repaired joins can fail with hot liquids. Keep repaired pieces decorative, or use them for dry goods only.
How much does professional pottery repair cost?
Simple professional repairs generally start around $100–$200, while invisible museum-quality restoration of valuable pieces can run several hundred dollars or more. For antiques and collectibles, that cost is usually worth it. A professional repair preserves far more value than a DIY one.