How To Make Pottery at Home
By Linda · · 9 min read
To make pottery at home, you need clay, a few basic hand tools, and access to a kiln. The process follows the same eight steps every time: wedge the clay, shape it (on a wheel or by hand), let it dry to leather-hard, trim it, let it dry bone-dry, bisque fire it, glaze it, and fire it a second time.
You do not need a wheel to start. Hand-building with pinch pots, coils, and slabs works on a kitchen table. The kiln is the only piece of equipment you can’t improvise, and you can rent kiln space at most local studios instead of buying one.
Essential Pottery Tools and Supplies
Here’s what I’d buy for a first home setup, with realistic price ranges:
- Clay: a 25 lb bag of stoneware or earthenware typically runs $15–$40
- Basic tool kit: wire cutter, wooden rib, metal rib, loop tool, needle tool, sponge. Kits cost $10–$25
- A work surface: a piece of canvas or a plaster bat so clay doesn’t stick
- Glazes: pints of commercial glaze run roughly $10–$25 each
- Kiln access: rent firing space at a local studio (often a few dollars per piece) or budget $700–$3,000+ for a small electric kiln
- A pottery wheel, if you must: beginner tabletop wheels start around $150–$400; studio-quality wheels run $900–$1,500+
Skip the wheel at first. Hand-building teaches you how clay behaves, and I cover the budget question in more detail in my guide on how to start pottery at home.
Choosing the Right Clay
Match the clay to your skill level and your firing options. If you’re renting kiln space, ask the studio what temperature they fire to and buy clay rated for that range.
| Clay type | Firing range | Best for | Difficulty |
|---|---|---|---|
| Earthenware | Cone 06–04, ~1,830–1,940°F (999–1,060°C) | Hand-building, decorative pieces | Easiest |
| Stoneware | Cone 5–10, ~2,167–2,345°F (1,186–1,285°C) | Functional ware: mugs, bowls, plates | Moderate |
| Porcelain | Cone 8–12, ~2,280–2,420°F (1,249–1,327°C) | Fine, translucent work | Hardest |
My recommendation for beginners is a mid-fire stoneware with a little grog (added sand-like texture). It’s forgiving, it throws and hand-builds equally well, and most community studios fire to cone 5 or 6.
If you can’t fire at all yet, air-dry clay lets you practice forming skills. Just know the results aren’t food-safe or waterproof.
Preparing the Clay (Wedging)
Wedging is kneading clay to push out trapped air bubbles and even out the moisture. Air pockets expand in the kiln and can crack your piece, or in bad cases blow it apart.
Cut your clay in half with a wire, slam the halves together, and knead on a non-stick surface like canvas-covered board. Repeat for 2–5 minutes until a wire cut through the middle shows no air holes.
Work on a sturdy table at hip height. Wedging on a wobbly or too-tall surface is the fastest way to a sore back.
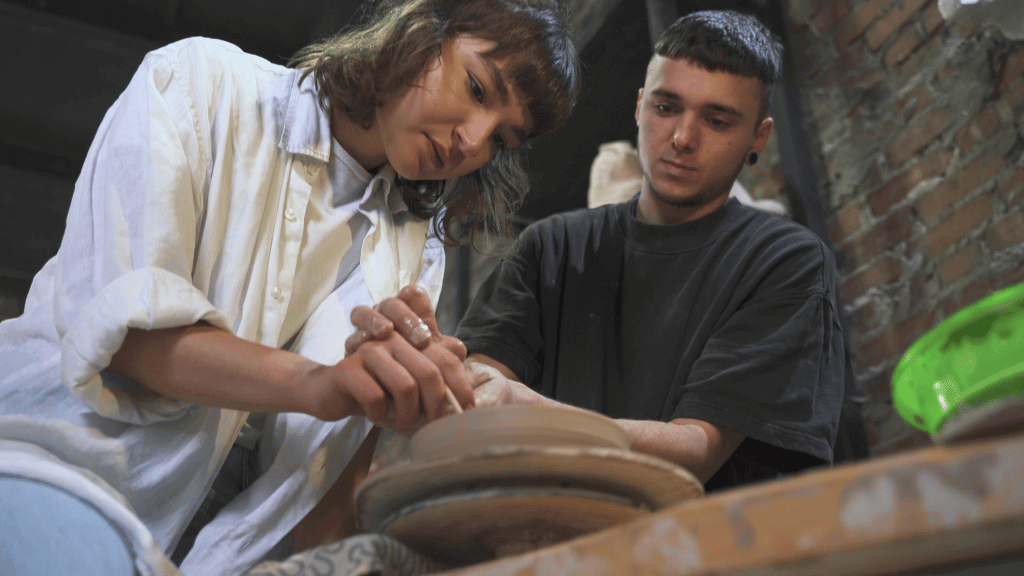
Centering the Clay on the Wheel
If you’re using a wheel, slap a wedged ball of clay onto the center of the wheel head and press it down firmly so it sticks.
With the wheel spinning at a moderate-to-fast speed and your hands wet, brace your elbows against your body and press the clay inward and downward until it spins without wobbling under your palms. Centering is the skill that takes longest to learn, so expect it to feel impossible for the first few sessions. I walk through the hand positions step by step in how to center clay on a pottery wheel.
No Wheel? Hand-Building Techniques
Hand-building is how most beginners should start, and it’s how potters worked for thousands of years:
- Pinch pots: open a ball of clay with your thumb and pinch the walls thin and even. Best first project.
- Coil building: roll ropes of clay, stack them, and blend the seams. Good for taller forms.
- Slab construction: roll clay flat with a rolling pin, cut shapes, and join them with scored edges and slip (clay slurry). Good for boxes, trays, and mugs.
Forming Your Pottery Piece
On the wheel or by hand, aim for walls of even thickness. About 1/4 inch (6 mm) is a good target for functional pieces. Uneven walls dry at different rates, and that’s where cracks start.
On the wheel: open the centered clay by pressing down with your fingers, then pull the walls up in two or three slow, steady passes. Beginners almost always go too fast — slow hands, faster wheel.
Add carving, stamping, or slip decoration while the clay is still soft to leather-hard.
Drying: The Stage Beginners Rush
Let your piece dry slowly and evenly to leather-hard (firm but cool and carvable, like cheddar cheese), then all the way to bone-dry (room temperature to the touch, lighter in color).
- Small, thin pieces: 2–7 days to bone-dry
- Large or thick pieces: 2–3 weeks or more
Keep drying pieces away from sunlight, heat vents, and drafts. Covering work loosely with plastic slows drying and prevents rims from cracking ahead of bases. For a fuller breakdown of timelines, see how long pottery takes to dry.
Trimming and Refining
At leather-hard, flip the piece and trim away excess clay with a loop tool. This is where you define the foot of a bowl or mug and get the weight right.
Smooth rough edges with a damp sponge. A finished-feeling pot is mostly made at this stage, not on the wheel.
Bisque Firing
Once bone-dry, the piece goes into a kiln for the first firing, called the bisque. Bisque firing is typically done to cone 06–04, about 1,830–1,940°F (999–1,060°C), and a full cycle including cooling takes roughly 12–24 hours.
Bisque firing turns fragile dry clay into hard, porous ceramic that absorbs glaze well. A standard kitchen oven tops out around 500°F (260°C), nowhere near hot enough, so this step requires a real kiln. If you’re weighing your options, I’ve written about whether you need a kiln for pottery and the workarounds.
If a piece explodes in the bisque, the cause is almost always moisture or air trapped in clay that wasn’t fully dry or well wedged.
Applying Glazes
Glaze is a glass coating that makes pottery waterproof, food-safe (when the glaze is rated for it), and finished-looking.
Wipe dust off the bisqueware with a damp sponge, then apply glaze by brushing (2–3 coats, letting each dry), dipping, or pouring. Keep glaze off the bottom of the piece and wipe a bare ring around the foot. Glaze melts in the kiln, and it will weld your pot to the kiln shelf if you skip this.
Buy commercial glazes rated for your clay’s firing temperature. A cone 06 glaze on cone 6 stoneware will run or burn out. And stick to glazes labeled lead-free and food-safe for anything that will touch food; old or imported glazes can contain lead, which has no place on a dinner plate.
Glaze Firing
The second firing melts the glaze into a glassy surface and matures the clay body. Earthenware glaze fires around cone 06–04; mid-fire stoneware at cone 5–6, about 2,167–2,232°F (1,186–1,222°C). Again, expect 12–24 hours including cool-down. Opening a kiln too early can crack your work.
When the kiln is cool, you have finished pottery.
Making Pottery at Home Without a Kiln
If kiln access is the sticking point, you have a few real options:
- Studio firing services: many community studios fire outside work for a per-piece or per-shelf fee. This is the route I recommend.
- Air-dry clay: no firing needed, fine for decorative pieces, not for food or liquids.
- Pit firing or a DIY raku setup: traditional outdoor methods that reach earthenware temperatures. Doable but smoky, weather-dependent, and not food-safe. See how to fire pottery without a kiln for the details.
What doesn’t work: your kitchen oven, a toaster oven, or a barbecue. None get hot enough to turn clay into ceramic.
Setting Up Your Home Pottery Studio
You need less space than you think. A corner of a garage, basement, or spare room works. Prioritize:
- A sturdy table and a stool at a comfortable height
- A washable floor (clay dust and carpet are a bad mix)
- Two buckets of water for cleanup, since clay rinsed down the sink settles and blocks pipes
- Shelving for drying work
- Ventilation, especially anywhere you mix dry materials or run a kiln
Clean with a wet sponge or mop rather than sweeping. Dry clay dust contains silica, and breathing it over years damages your lungs. Wet cleaning keeps it out of the air. Wear an N95 or better respirator when handling dry clay or glaze powders.
Practice Plan for Your First Month
- Week 1: Wedging plus pinch pots. Make five; keep the best one.
- Week 2: Coil-built cup or small vase. Focus on blending seams.
- Week 3: Slab tray or mug. Practice scoring and slipping joints.
- Week 4: Refine, trim, and get pieces bisque fired.
Expect your first ten pieces to be heavy and lopsided. Mine were. Improvement in pottery is measured in pounds of clay used, not days. If you’re wondering whether self-teaching is realistic at all, my honest answer is in can I learn pottery at home.
Frequently Asked Questions
Can I use my regular kitchen oven for firing pottery?
No. Kitchen ovens reach about 500°F (260°C), while even low-fire earthenware needs roughly 1,830°F (999°C). Oven-dried clay stays brittle, dissolves in water, and is never food-safe. Use a kiln, a studio firing service, or choose air-dry clay for decorative work.
How much does it cost to start making pottery at home?
A hand-building setup (25 lb of clay, a tool kit, and a couple of glazes) costs roughly $50–$100, plus per-piece studio firing fees. Adding a beginner wheel raises that by $150–$400, and buying your own small kiln adds $700–$3,000 or more.
How long does it take to make a piece of pottery from start to finish?
Plan on 2–4 weeks: a session to form it, several days to two weeks of drying, a bisque firing, a glazing session, and a glaze firing, with each kiln cycle taking 12–24 hours including cooling.
How can I prevent cracks in my pottery?
Wedge thoroughly to remove air, keep wall thickness even, join parts with score-and-slip, dry pieces slowly under loose plastic away from drafts, and make sure work is completely bone-dry before bisque firing.
Do I need a pottery wheel to make pottery at home?
No. Pinch, coil, and slab hand-building produce everything from mugs to large vessels with no machinery. A wheel speeds up round, symmetrical forms but adds cost and a steep learning curve, so most people are better off starting by hand.
How should I dispose of clay water and scraps?
Never pour clay water down a drain; it settles and clogs pipes. Let the bucket sit until the clay sinks, pour off the clear water, and put the sludge in the trash (or dry it for recycling). Unfired scraps can be rehydrated and wedged back into workable clay.